
Redirecting Microsoft ForeFront Endpoint Protection AV Pattern Files
One of the best practices that Citrix recommends for XenApp or XenDesktop provisioned machines is redirecting the anti-virus pattern files to a persistent drive. This blog post describes the required steps for redirecting the Microsoft ForeFront Endpoint Protection (MSFEP) AV Pattern Files to a different location.
Background
When a machine, which is provisioned by Citrix Provisioning Services and the provisioned vDisk uses theStandard Image Mode and the optionwrite cache on device’s hard disk or
server’s hard disk, is rebooted it loses its changes that were written to the write cache file. That means that changes to the C:-drive are lost after a reboot of the machine.
MSFEP, by default, writes the AV pattern files toC:ProgramDataMicrosoftMicrosoft AntimalwareDefinition Updates_.
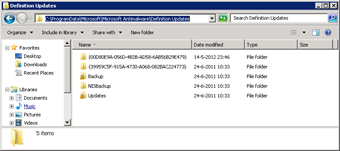
That means that AV pattern files that are downloaded in this folder are lost after a reboot and need to be re-downloaded. To preserve the downloaded AV pattern files we are going to redirect the location of the downloaded AV pattern files to the write cache disk. I say write cache disk, not write cache file!
Steps for Redirecting the AV Pattern Files
IMPORTANT: Redirecting the AV pattern files involves changing settings in the Windows Registry. However, serious problems might occur if you modify the registry incorrectly. Therefore, make sure that you follow these steps carefully. For added protection, back up the registry before you modify it. Then, you can restore the registry if a problem occurs.
In this example we are going to redirect the AV pattern files toD:FEP_.
{{< rawhtml >}}
 |
Stop the serviceMicrosoft Antimalware Service_ |
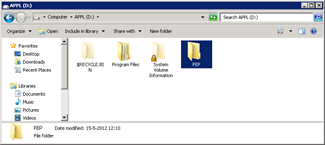 |
Create the folderD:FEP_ |
 |
Open theRegistry Editor and browse toHKLMSoftwareMicrosoftMicrosoft Antimalware_ |
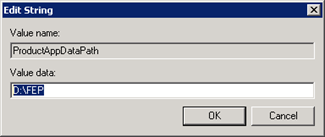 |
ChangeProductAppDataPath** **_toD:FEP_ |
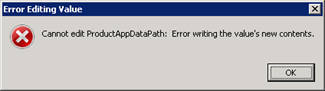 |
You’ll notice the error that you can’t change the value. This is because only theSYSTEM account has enough permission to change settings in theMicrosoft Antimalware_registry key and sub keys.There are two options.
1) Change ownership of theMicrosoft Antimalware registry key and continue. 2) Perform the changes using theSYSTEM account. (Recommended) In this example we use the recommended method by using theSYSTEM account. We do this by using the utility [_PsExec.exe_](http://live.sysinternals.com/PsExec.exe). Therefore we continue from the command line. |
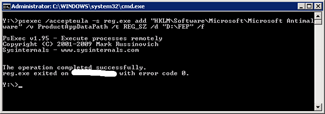 |
Type the commandpsexec /accepteula –s reg add “HKLMSoftwareMicrosoftMicrosoft Antimalware” /v ProductAppDataPath /t REG_SZ /d “D:FEP” /f_This changes the path where the AV pattern files are stored toD:FEP_.
The–s is used forPsExec to execute under theSYSTEM account. |
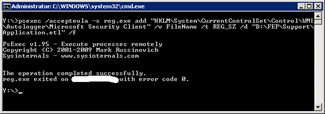 |
Type the commandpsexec /accepteula -s reg.exe add “HKLMSystemCurrentControlSet __ControlWMIAutologgerMicrosoft Security Client” /v FileName /t REG_SZ /d “D:FEPSupportApplication.etl” /f_This changes the location of the first file for theEvent Viewer_. Events that are logged to theEvent Viewer are redirected to the write cache disk and saved after a reboot. |
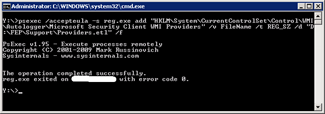 |
Type the commandpsexec /accepteula -s reg.exe add “HKLMSystemCurrentControlSet __ControlWMIAutologgerMicrosoft Security Client WMI Providers” /v FileName /t REG_SZ /d “%FEPLocation%SupportProviders.etl” /f _This changes the location of the second file for theEvent Viewer_. |
| Reboot the server | |
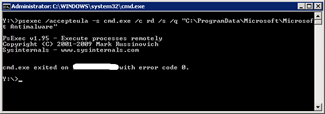 |
Type the commandpsexec /accepteula -s cmd.exe /c rd /s /q “C:ProgramDataMicrosoftMicrosoft Antimalware”_This removes the left over from the initial FEP configuration. |
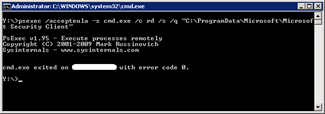 |
Type the commandpsexec /accepteula -s cmd.exe /c rd /s /q “C:ProgramDataMicrosoftMicrosoft Security Client”_This removes the left over from the initial configuration. |
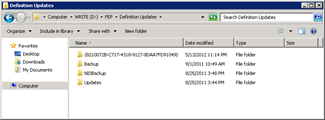 |
The AV pattern files are now automatically downloaded toD:FEP_. |
{{< /rawhtml >}}
Example Scripts (CMD)
|
1 2 3 4 5 6 7 8 9 10 11 12 13 14 15 16 17 18 19 |
::Redirect AV Pattern Files net stop "Microsoft Antimalware Service" cmd /c md "D:FEP" psexec /accepteula -s reg.exe add "HKLMSoftwareMicrosoftMicrosoft Antimalware" /v ProductAppDataPath /t REG_SZ /d "D:FEP" /f psexec /accepteula -s reg.exe add "HKLMSystemCurrentControlSetControlWMIAutologgerMicrosoft Security Client" /v FileName /t REG_SZ /d "D:FEPSupportApplication.etl" /f psexec /accepteula -s reg.exe add "HKLMSystemCurrentControlSetControlWMIAutologgerMicrosoft Security Client WMI Providers" /v FileName /t REG_SZ /d "D:FEPSupportProviders.etl" /f shutdown /r /t 0 ::Remove Left Over Initial Configuration psexec /accepteula -s cmd.exe /c rd /s /q "C:ProgramDataMicrosoftMicrosoft Antimalware" psexec /accepteula -s cmd.exe /c rd /s /q "C:ProgramDataMicrosoftMicrosoft Security Client" |