
HOWTO: Automate the creation of Citrix PVS boot devices (ISO/VMDK)
Recently, I was working for a customer to automate the deployment of a Citrix Provisioning Services environment (PVS). The customer didn’t want to use the PXE and TFTP method for booting the target devices to PVS. Instead, the customer chose to use the CD-ROM (ISO) boot method for their target devices.
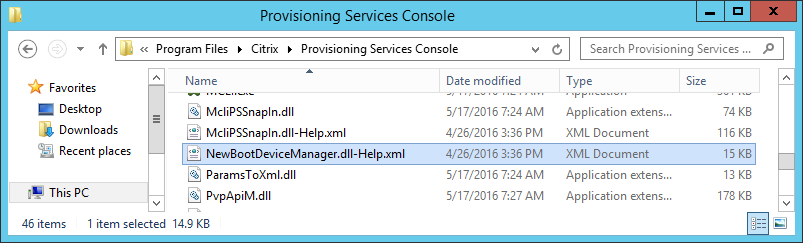
Because I wanted to automate the complete environment, including the creation of the ISO files, I was having a challenge. Searching the internet didn’t give me any results. Therefore, I gave it a last try by searching the PVS program folder. What I found there was really interesting. I came across this file called NewBootDeviceManager.dll-Help.xml.
I opened this file in Notepad and found the following content.
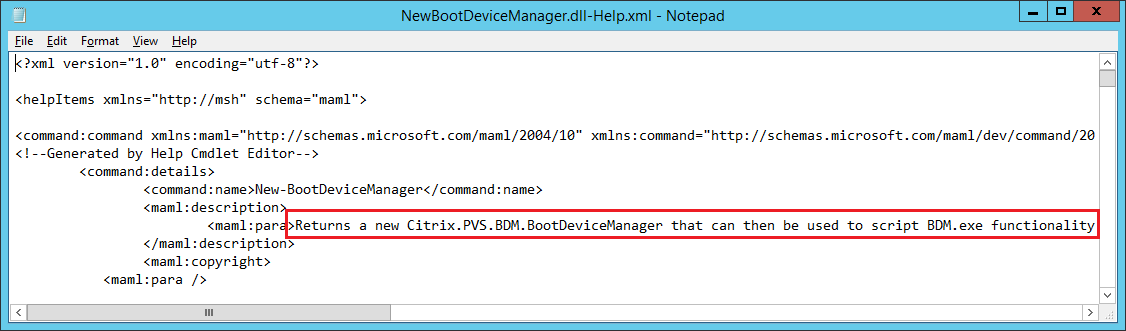
Now it got interesting. This might just be the thing I needed. But how to use it?
Reading a bit further in the NewBootDeviceManager.dll-Help.xml file, I found this is actually a proper PowerShell snap-in. Simply a registration of a DLL file, adding the snap-in in PowerShell, and Bob’s your uncle.
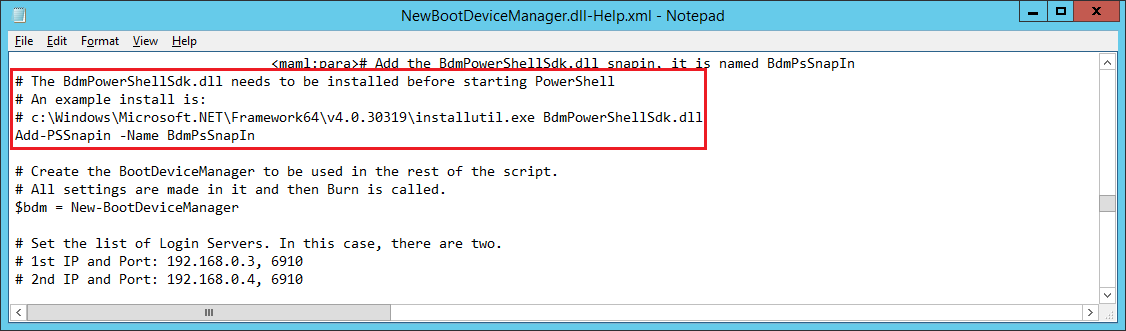
The _NewBootDeviceManager.dll-Help.xml _file also gives some examples for creating different boot devices, like ISO files and boot partitions (VMDK).
Step 1 – Start the PowerShell Console in Administrator mode
So, let’s put this into action by starting the PowerShell console in Administrator mode. This is required, because we are going to install the BdmPowerShellSdk.dll file.
Step 2 – Install the DLL

Execute the following command:
|
1 |
c:WindowsMicrosoft.NETFramework64v4.0.30319installutil.exe "C:Program FilesCitrixProvisioning Services ConsoleBdmPowerShellSdk.dll" |
Remember to change the path to installutil.exe for x86 environments.
Make sure the DLL is installed properly by looking for two lines that say “The Commit phase completed successfully.” and “The transacted install has completed.“.

Step 3 – Add the snap-in

Execute the following command:
|
1 |
Add-PSSnapin -Name BdmPsSnapIn |
Step 4 – Execute the (example) code
Execute the following commands:
|
1 2 3 4 5 6 7 8 9 10 11 12 13 14 15 16 17 |
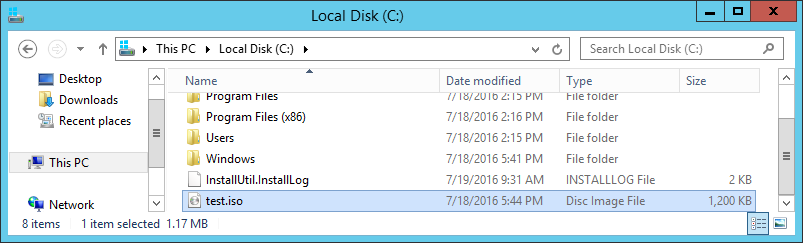
$bdm = New-BootDeviceManager $LoginServerList = New-Object 'System.Collections.Generic.List[System.Collections.Generic.KeyValuePair[string,string]]' $ls = New-Object 'System.Collections.Generic.KeyValuePair[string,string]'("192.168.1.1", "6910") $LoginServerList.Add($ls) $ls = New-Object 'System.Collections.Generic.KeyValuePair[string,string]'("192.168.1.2", "6910") $LoginServerList.Add($ls) $bdm.LoginServers = $LoginServerList $bdm.SetOptions($true, $false, $true, 5000, 30000, $false, 0) $bdm.DeviceIpDHCP = $True $bdm.DiskString = "Citrix ISO Image Recorder" $bdm.ISOFileName = "C:test.iso" $bdm.Burn($false, $false) |
This example adds two PVS login servers, uses DHCP and outputs this to an ISO file C:test.iso.
For the full list of options and some examples, execute one of the following commands:
|
1 2 3 4 5 |
help New-BootDeviceManager help New-BootDeviceManager -Full help New-BootDeviceManager -Examples |
Exception calling “Burn” with “2” argument(s): “ISOFileName must be called with the name of the new ISO file to create.”
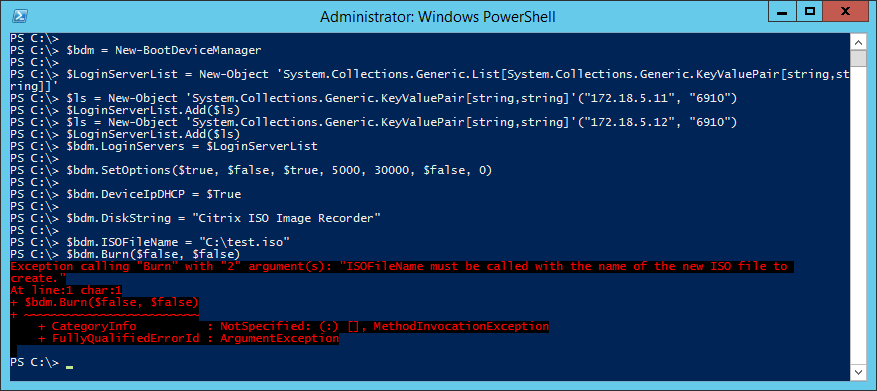
If you come across the error Exception calling “Burn” with “2” argument(s): “ISOFileName must be called with the name of the new ISO file to create.”, this is a bug in the file BDMworker.dll. Citrix has a private hotfix that provides an updated version of BDMworker.dll that fixes this bug. Contact Citrix to receive the private hotfix.
Udate: This issue has been fixed definitively with the release of Citrix Provisioning Services 7.12. See their fixed issues list here.
Important note:
I have only tested the above steps with Citrix Provisioning Services version 7.8 and 7.9. I am not sure if it is also available or if it works in earlier versions.