Let’s JMP – Part 1: Introduction
This blog article called “Let’s JMP” gives you an introduction and impression to the possibilities and how to setup VMware’s Just-in-Time Management Platform (JMP), or what VMware calls “Jump”, in your (LAB) environment. This is NOT a best practices blog post, and should not be considered as such.
I have split “Let’s JMP” in several parts. If you want to skip to a specific part, here is the list.
Let’s JMP – Part 1: Introduction
Let’s JMP – Part 2: ESXi & vCenter
Let’s JMP – Part 4: AppVolumes
Let’s JMP – Part 5: User Environment Manager (UEM)
Let’s JMP – Part 6: Windows 10 Image
Let’s JMP – Part 7: Creating the AppStack
Let’s JMP – Part 8: Putting the pieces together
What is Just-in-Time Management Platform (JMP)?
JMP is a platform that allows an organization to be flexible, and to easily and quickly adopt changes. It does this by utilizing multiple components for building systems and providing applications and settings in real-time.
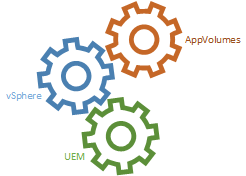
The components that make up JMP are:
vSphere: Delivers instant clones by swiftly cloning a running virtual machine
AppVolumes: Delivers real-time application delivery
User Environment Manager: Delivers context aware user configuration (settings, application shortcuts, printers, etc.) and allows saving personalized (application) settings
My LAB Environment
Hardware
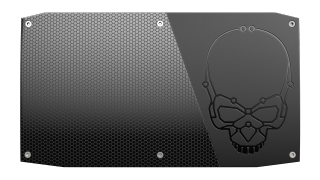
For this blog series I will be implementing JMP in my LAB environment which is built on an Intel NUC Skull Canyon (NUC6i7KYK) with 32GB memory, 2x mSATA flash drives (250GB and 500GB), single NIC.
If you want to build your own LAB, I recommend going over to openhomelab.org. This site contains a lot of useful information regarding hardware, recommended BIOS settings, (tested) configurations, etc.
If you don’t have the resources for building your own LAB environment, using VMware’s Hands-on Labs may be a good alternative for you.
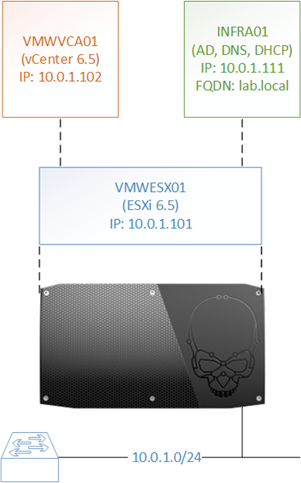
Infrastructure and Network Overview
I have my infrastructure and network already up and running and looks like this (very simple overview ;-)):
During the different parts I will refer to names and values that are available in, or applicable to my environment. You can off course change any names or values to anything you want yourself.
Here’s a brief overview of the names/values I use during the different parts.
| LAB | Domain Name (Netbios) |
| lab.local | Domain Name (FQDN) |
| Admin | Domain Administrator (LAB) |
| administrator@vsphere.local | vSphere Administrator |
| testuser01 | Domain (test) user (LAB) |
| JMP-Users | Domain Global Group (LAB) |
| VMWVCA01 | vCenter Appliance |
| VMWCS01 | Horizon Connection Server |
| VMWAV01 | App Volumes Manager |
| VMWESX01 | ESXi Host |
| INFRA01 | Domain Controller, DNS, DHCP Server |
| WIN10 | Windows 10 Image |
| UEM_Config | UEM Configuration Files Share |
| UEM_ProfileArchives | UEM Profile Archives Share |
Software Bits and Bytes
All required software and operating systems can be downloaded as an evaluation copy.
VMware products can be downloaded here.
Microsoft Operating Systems can be downloaded here.
If you want to have the VMware products running longer than the default of 60 days for evaluation, it may be a good idea to have a look at VMUG Advantage. This allows you to run evaluations for 365 days and also has other advantages.
End Results
After following all parts (2 – 8), you should have an environment up and running, in which you should be able to launch a Windows 10 desktop which is an instant clone and in which you can live assign an AppStack with some applications which will appear directly on your desktop as shortcuts, managed by UEM.
NextUp >>Let’s JMP – Part 2: ESXi & vCenter